|
| Buffed Surface |
Nobody cleans a rental car… isn’t that universally true? However when it concerns our beloved acoustic guitars, we expect the best. This edition of Bite Size Tips discusses the look of our beloved acoustic guitars, vis-à-vis the purposes and meanings of polishing & buffing.


Some people only recognize that buffing involves hand tools but that isn’t true. Before the invention of hand tools, buffing was purely manual. I will describe my experiences in buffing. Please don’t take it as biblical truth as you may discover other better ways. Presumably, some of you have already developed certain unique ways to do so.
Most guitar owners like their guitar new. I mean to look new at least. For this cosmetic quality to sustain, one must maintains the guitars by cleaning them. In the case of cosmetic finishing, the specific tasks in discussion are polishing and buffing.
What is polishing and buffing?
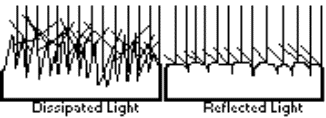
In general, polishing is antecedent to buffing. Polishing and buffing involves the use of abrasives to smoothen surfaces except the abrasives used in buffing are less harsh. In any unfinished surfaces when magnified, you expect to see multiple ridges, peaks, trough and valleys. In a nutshell, it has massive amount of undulations. Such undulated surfaces made poor light reflectors thus we don’t see shine from such surfaces. However when a surface is polished, the ridges, peaks, trough and valleys are flattened but not totally flushed. Even it is not totally flat, the smoother surfaces made better light reflectors thus we can observe the shine. Therefore we considered these surfaces polished or buffed and they look good to us.
Buffing compound can carry petrol distillates or silicon carbides. For buffing guitars, we generally avoid any with silicon carbide because they may be too hard for lacquer finishing. Personally I have attained good results from using buffing compound with petrol distillates. In buffing, heat is generated by means of the rubbing motion between the buffing equipment and the surfaces. The heat melts away the substances within the buffing compound and it fills the valleys and trough of the surface thus smoothening the surface further. As expected, we can get better surface shine from buffing process than merely polishing alone.
Here’re two of such products you can get locally (in Singapore).
Taken from: http://www.mx5mania.com.au/images/product_pics/1173/medium/0171621_m.jpg
Taken from: http://static.productreview.com.au/pr.products/turtle-wax-premium-polishing-compound_4d2e579931b5f.jpg
Before you begin, make sure you are equipped with,
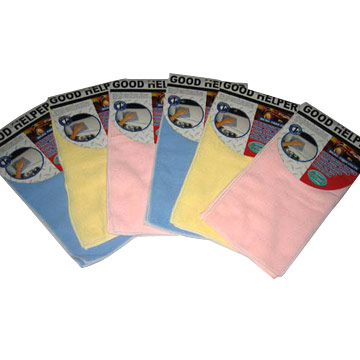
1. Microfiber clothes
2. Buffing compound
 |
| Microfibre Cloth |
- Place the guitar on a well cushion surface (table top) with minimum obstructions or items around it. You don’t want to reach the final part and get a ding from some sharp objects that are lying near your guitar.
- Make sure the guitar surfaces are clean and dry
- Apply buffing compound on the surfaces to be buff
- Fold the microfiber cloth to suitable size, manually rub the buffing compound over the surface
- Go in circular motions and straights as well
- Keep rubbing until you don’t see any residual of buffing compound
- Keep the motion going until you see the changes to the surfaces
- You should see higher shine on the buff surfaces.
ATTENTION to all satin or matt finished guitar owners, if you buff your satin or matt finished guitars, they will turn into semi-gloss. You might want to consider before doing. If you just wish to keep it clean, simply wipe the satin or matt guitars with microfiber clothes that is slightly damped.
Some pictures for comparison between before buffing and after.
Some pictures for comparison between before buffing and after.
 |
| Before |
 |
| After |
 |
| Half Buffed |
As you can see from the pictures, the outcome can be pretty amazing. There is nothing like showing care and concern. Hope you can find joy doing it.
- End of article -